Controlling the Viewer#
In The Basics, you already learned how to open a new octarine.Viewer and add a simple mesh, and Managing Objects showed you how to inspect and access objects on the viewer.
Here we will demonstrate various ways to programmatically control the viewer.
Closing the viewer#
Use octarine.Viewer.close() to close the viewer:
>>> import octarine as oc
>>> v = oc.Viewer()
>>> v.close()
Adjust size#
Use octarine.Viewer.resize() to adjust the size of the viewer:
>>> v = oc.Viewer()
>>> v.resize((1000, 1000))
Camera#
Use octarine.Viewer.center_camera() to center the camera onto objects in the scene:
>>> v = oc.Viewer()
>>> v.center_camera()
Use octarine.Viewer.set_view() to set the camera view:
>>> v = oc.Viewer()
>>> v.set_view('XY')  # set view to frontal
Found a nice view? You can save the camera state and re-apply later to get the exact same view again:
>>> state = v.get_view()  # get the current view
>>> v.set_view(state)  # re-apply the view
Linking viewers#
Comparing two things side by side is much easier if they move together. Use octarine.Viewer.link() to keep the camera synchronised between viewers:
>>> v1 = oc.Viewer()
>>> v2 = oc.Viewer()
>>> v1.link(v2)
From now on, panning, rotating or zooming in either viewer does the same in the other. The same goes for octarine.Viewer.set_view() and octarine.Viewer.center_camera() (including the implicit centering when you add objects) - but not for changes you make directly on the Viewer.camera object. On linking, the other viewer immediately adopts the view of the viewer you called link() on.
Links are symmetrical and transitive: linking v1 to v2 and then v2 to v3 means that all three move together. You can also link several viewers in one go:
>>> v1.link(v2, v3)
Use octarine.Viewer.unlink() to break the link again. Without arguments it removes the viewer itself from its group (leaving the others linked with each other); with arguments it removes the given viewers:
>>> v1.unlink(v3)  # v3 moves on its own again, v1 and v2 stay linked
>>> v1.unlink()  # v1 moves on its own again too
The octarine.Viewer.linked property tells you who a viewer is currently linked with.
Partial links
Sometimes you only want to share part of the camera state - e.g. rotate in lockstep but zoom into each viewer separately. Use the sync or exclude parameters for that. The three interactive controls map onto "position" (panning), "rotation" (rotating) and "width" + "height" (zooming):
>>> v1.link(v2, sync='rotation')  # only rotate together
>>> v1.link(v2, exclude=['width', 'height'])  # everything but the zoom
Viewers don't have to show the same data, use the same controls or even be of the same camera type: linking an orthographic with a perspective viewer works fine, the field of view simply stays out of the sync.
Colors#
Use octarine.Viewer.colorize() to randomize colors:
>>> v = oc.Viewer()
>>> v.colorize(palette='seaborn:tab10')
Use octarine.Viewer.set_colors() to set colors for given objects:
>>> v = oc.Viewer()
>>> v.add(cube, name='cube')
>>> v.set_colors('w')  # set color for all objects
>>> v.set_colors({'cube': 'r'})  # set colors for individual objects
Background#
Use octarine.Viewer.set_bgcolor() to change the background color:
>>> v = oc.Viewer()
>>> v.set_bgcolor("white")
Pass two or four colors for a linear gradient - two run bottom to top, four set the bottom left, bottom right, top left and top right corner:
>>> v.set_bgcolor("black", "#1B2838")
For something more photographic there is octarine.Viewer.set_bg_gradient(): a radial "studio" gradient, i.e. a soft pool of light behind the object that fades into near-black towards the edges of the frame. Octarine ships a handful of presets:
>>> v.set_bg_gradient("graphite") # the default
| Preset | Description |
|---|---|
graphite | Neutral studio grey; the all-rounder (default) |
cinematic | Desaturated blue-black; dark metals, tech, sci-fi |
warm | Warm charcoal; flatters brass, bronze, wood, leather |
olive | Muted olive; organic and natural materials |
burgundy | Dusty burgundy; editorial/photographic |
halo | Near-black halo; dramatic, minimal |
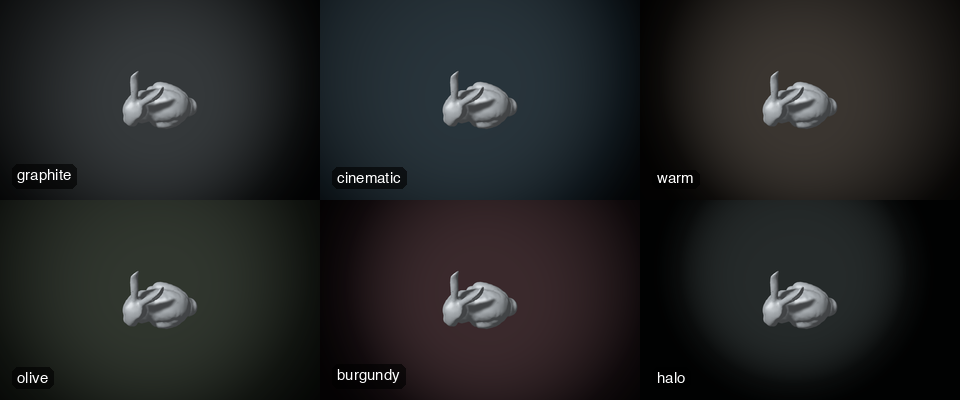
The presets are just starting points - each of the parameters can be overridden (see octarine.Viewer.set_bg_gradient for details):
>>> # Move the light pool to the right and tighten it
>>> v.set_bg_gradient("cinematic", center=(0.65, 0.4), radius=0.5)

>>> # Or roll your own: (inner, mid, outer) colors
>>> v.set_bg_gradient(colors=("#3A292C", "#180F12", "#070405"), vignette=0.4)
Note that the gradient is fixed to the canvas: it does not move with the camera, and radius is relative to the canvas width so the shape of the pool does not change when you resize the window. Use set_bg_gradient(None) (or set_bgcolor("black")) to go back to a plain background.
The presets are also available from the Background dropdown in the GUI controls - a gradient you set up via the API shows up there as "Custom" so you can switch away from it and back again.
Hotkeys#
While the viewer or widget is active you can use a set of hotkeys to control the viewer:
| Hotkey | Description |
|---|---|
1 | Set frontal (XY) view |
2 | Set dorsal (XZ) view |
3 | Set lateral (YZ) view |
f | Show/hide frames per second |
c | Show/hide control panel (requires PySide6) |
You can bind custom keys using the octarine.Viewer.bind_key() method:
>>> v = oc.Viewer()
>>> # Bind `x` key to clearing the viewer
>>> v.bind_key(key="x", func=v.clear)
Overlay message#
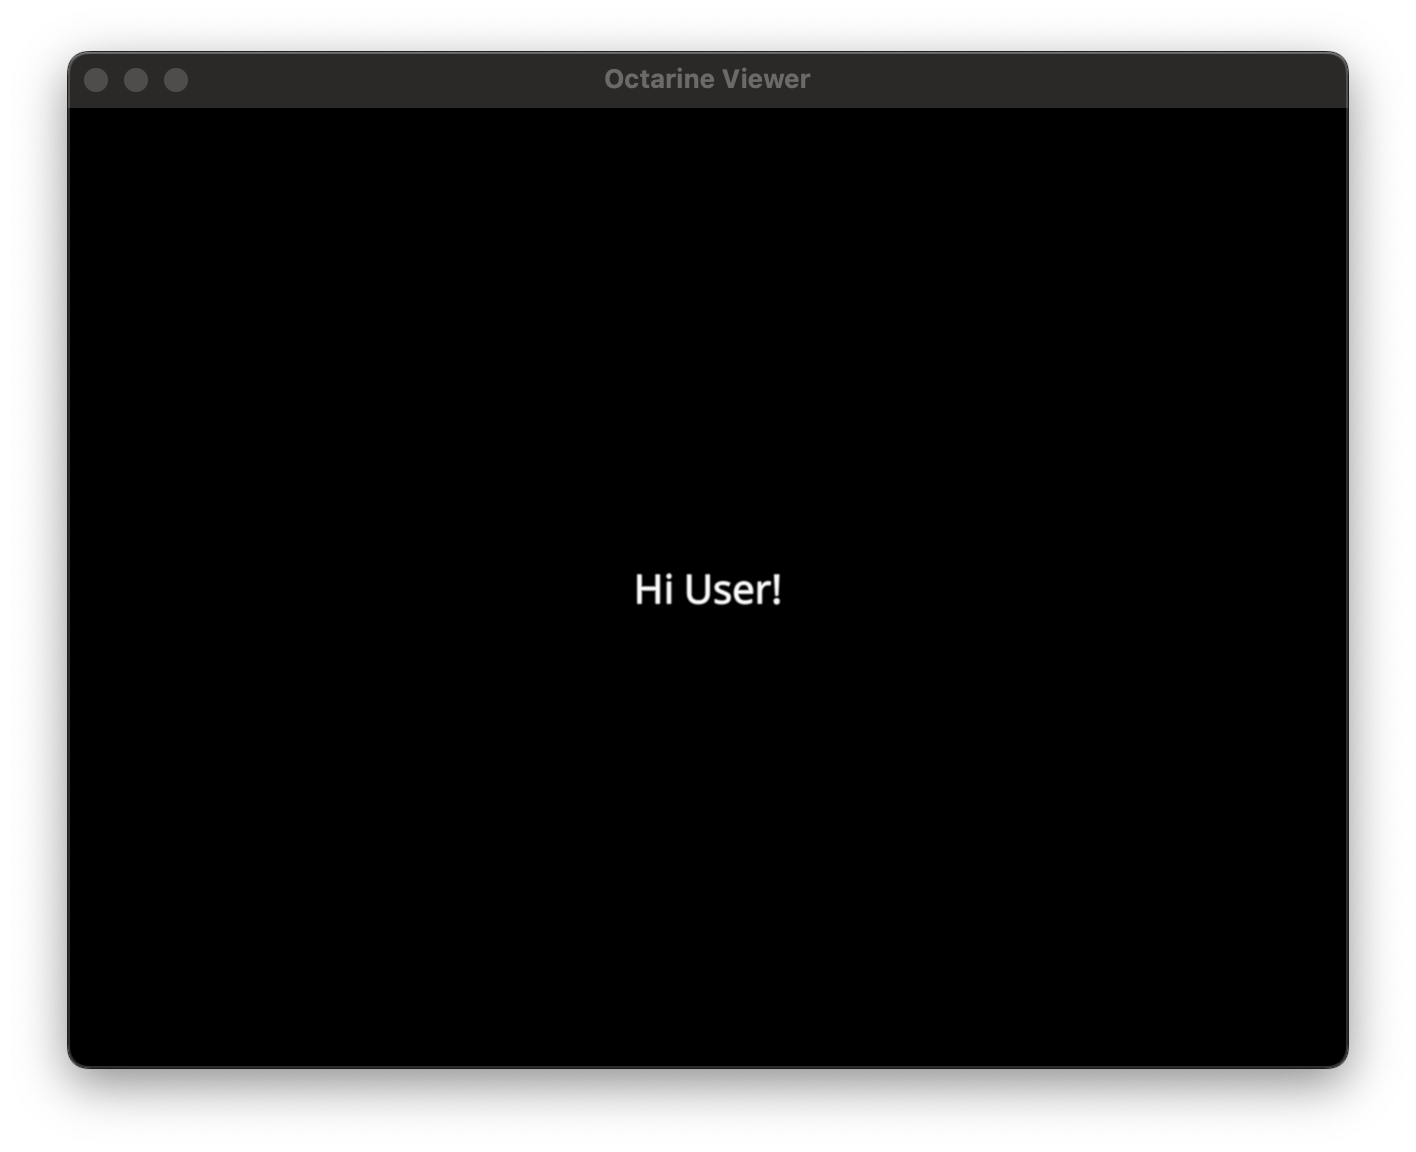
Need to communicate with the user? Try the octarine.Viewer.show_message():
>>> v = oc.Viewer()
>>> v.show_message("Hi User!",
...                duration=2,  # fade out after 2s
...                position='center')
Scale bar#
Use octarine.Viewer.set_scalebar() to overlay a scale bar. By default the bar is dynamically re-sized as you zoom, always showing a "nice" round number:
>>> v = oc.Viewer()
>>> v.set_scalebar(units="nm")
You can also pin it to a fixed size and move it to another corner:
>>> v.set_scalebar(1000, units="nm", position="top-left")
To remove it again:
>>> v.set_scalebar(False)
Note
Scale bars require an orthographic camera (the default). With a perspective camera the scale depends on the distance from the camera and a single bar would be meaningless - set_scalebar will therefore raise an error and an existing bar is hidden if you set Viewer.camera.fov to a non-zero value.
Lighting#
By default, the scene is lit by a single "headlight" (plus a weak ambient light) that is linked to the camera, i.e. objects are always lit from the front no matter how you rotate the scene.
Set octarine.Viewer.headlight to False to instead use two point lights that are fixed in space: a strong one from the front/top/left and a weaker one from the back. The lighting then changes as you move the camera around - which side of an object is lit depends on where you're looking from:
>>> v = oc.Viewer()
>>> v.headlight = False
You can also set this when initializing the viewer:
>>> v = oc.Viewer(headlight=False)
The headlight is not exactly head-on but offset slightly to the top-left of the camera - a light shining exactly along the view direction makes objects look rather flat. Pass a float or an (x, y) / (x, y, z) tuple instead of True to switch the headlight on with a different offset (in camera space):
>>> v.headlight = 1        # shorthand for (-1, 1, 0): further to the top-left
>>> v.headlight = (1, -1)  # light from the bottom-right instead
>>> v.headlight = 0        # exactly head-on (flat shading)
The offset is remembered when you switch the headlight off and on again.
Note
Use Viewer._headlight.intensity to change the headlight's brightness.
The ambient light is independent of this setting. Use Viewer.lights to get all light sources (including the headlight) if you want to fine-tune them:
>>> [light.intensity for light in v.lights]
[0.5, 4.0, 1.0, 4.0]
Shadows#
Objects cast shadows onto each other by default. Use octarine.Viewer.shadows (or the shadows parameter) to switch that off and on again:
>>> v = oc.Viewer()
>>> v.add_mesh(mesh)
>>> v.shadows = False

>>> # ... or right from the start
>>> v = oc.Viewer(shadows=False)
Shadows have to be rendered from each light's point of view, so the lights and their shadow cameras are automatically fitted to the scene - and re-fitted whenever you add or remove objects. That means the two static lights move in much closer than they normally sit, which slightly changes the shading. The headlight moves too, but it is a directional light, where only the direction matters - so its shading is unaffected.
Shadow edges are deliberately soft. A shadow map is sampled on a grid fixed in the light's frame, so when the light turns - which the headlight does whenever you rotate the camera - the samples land on different points and a hard edge crawls. Filtering over a wider disk turns that crawl into a gentle gradient.
To trade softness back for sharpness, narrow that disk. The kernel is compiled into the shader, so this has to happen before you make a viewer:
>>> from octarine.shaders.pcf import configure
>>> configure(taps=9, radius=2)  # sharper, and cheaper
>>> v = oc.Viewer()
Note
Only meshes can receive shadows. Lines and points do cast them but are never shaded themselves, and volumes take no part in shadows at all.
GUI Controls#
The control panel is organized into five tabs:

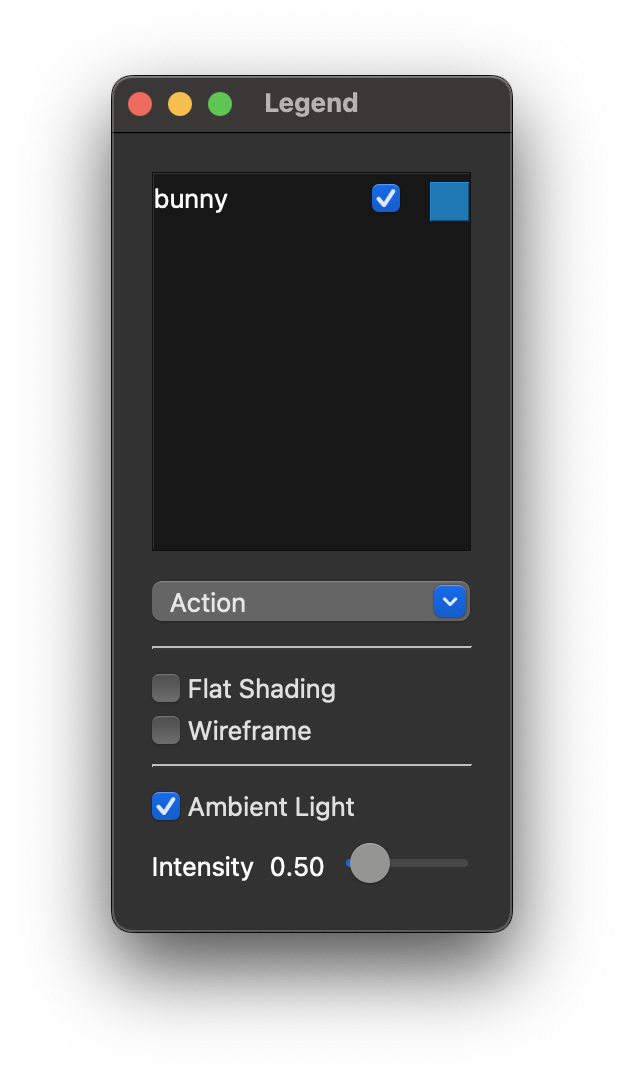
- Legend: one entry per object with a color button and a visibility checkbox. Objects added with a
group(see Managing Objects) appear as collapsible entries with member counts that can be toggled or colorized as one. Use the filter field to search entries by name; hovering over an entry highlights the corresponding object in the viewer. - Controls: viewer-wide settings - what happens on hover and double-click (see Selecting Objects), flat shading/wireframe for meshes, an FPS counter, lighting (see Lighting) and the render trigger.
- Screenshot: save a screenshot to file (with options for size and a transparent background) or copy it straight to the clipboard. Pointing it at a folder instead of a file collects numbered screenshots in there (
screenshot_0001.png,screenshot_0002.png, ...). - Effects: one collapsible section per effect - shadows, eye-dome lighting, ambient occlusion, silhouette rendering, subsurface scattering and depth of field. The checkbox switches an effect on, the arrow next to it expands its parameters - see Effects & Shading.
- Animation: set up an orbit around the scene (or around the objects selected in the legend), or fly through views you captured yourself, then preview it in the viewer and record it to a video - see Animations.
Shell/IPython#
Octarine GUI controls when run from the shell currently require PySide6 to be installed and you may have to use %gui qt when inside IPython (recent versions of Octarine will typically run this for you automatically).
To activate them you can either press the c hotkey or:
>>> v = oc.Viewer()
>>> v.show_controls()
Jupyter#
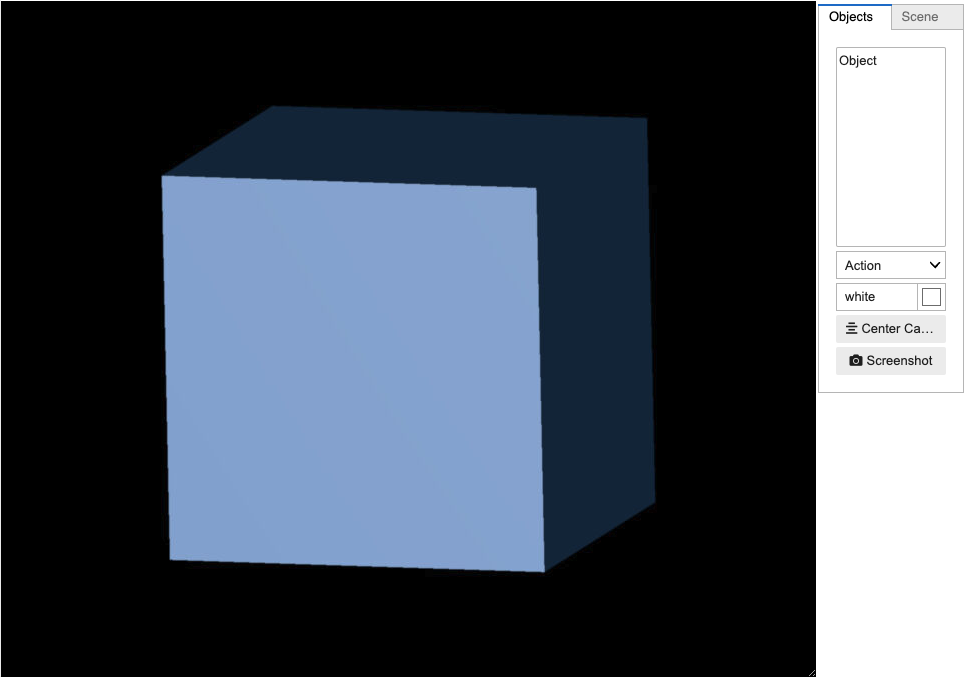
For GUI controls in Jupyter/lab you won't need any additional dependencies.
To activate them you can either press the c hotkey or:
>>> # Show viewer widget with `toolbar=True`
>>> v = oc.Viewer()
>>> v.show(toolbar=True)

>>> #... or do this afterwards
>>> v.show_controls()
What next?#
-
Objects
Check out the guide on different object types.
-
Animations
Add movement to the viewer.